The Riders' Blog
Workout Wednesday: Your Day-Before a Show Workout June 24 2015

Why bother?
When you're gearing up for any athletic event, whether you're running a marathon or showing your horse, making sure you take good care of your body is an essential part of your preparation. Here's why a short, easy workout is a good idea for the day before a show:
- You'll prime your body to perform at peak level. Your neuromuscular coordination can begin to deteriorate - or improve - in literally a single day without exercise.
- A light workout will increase the blood flow to your muscles, keeping you loose and flexible.
- You'll relieve the tension that you inevitably get when you're sitting around, because when you're getting nervous, it feels so much better to do something!
How do I do it?
Any light cardio workout will do, but I'm a fan of doing a 20-minute run, with 4-6 bursts of higher-intensity intervals, of around 20 seconds each. However, you could just as easily use a stationary bike or elliptical if you'd prefer a lower-impact workout. Once you're done, do a light cooldown like the one below:
Do you have any 'day before' tips or traditions that help prepare you for a show? Let us know in the comments below or over at our Facebook page.
The Three Rookie Mistakes You Have to Avoid When Entering the Show Ring June 15 2015 1 Comment

Let’s face it, if you have a show horse, the moment you step through the in-gate your horse is going to be P-U-M-P-E-D pumped! The roar of the crowd, the sweet, sweet organ music, the smell of fresh shavings - the things all of us equestrians live for (organ music being an accidental addiction fueled only by the fact that it is inexplicably played at EVERY horse show and therefore gives us that horse show feeling). The thing is, our horses live for it too, that’s why they are called “Show Horses!”
The problem that is, the adrenaline that hits you when you’re heading into your class hits your horse too. As a result, far foo many riders end up entering the ring at the canter, or basically any gait that is NOT a trot! While the judges aren't able to base their scores on events seen before the gate is closed, it is undeniable that they will be looking for mistakes when the class is called to order. SO here are the three common mistakes made while entering the ring, and how to avoid them.
Steering to the right
While this sounds simple, I guarantee you’ve heard your trainer screaming behind you “STRAIGHT DOWN THE MIDDLE!!!!” as they run along side you into the ring. The reason they're screaming at you is that if you head into the ring and immediately take a sharp turn to the right to suck yourself up onto the rail (which will likely just cause you to get covered up by all the other horses already in the ring or entering the ring) you’re going to unbalance your horse and fundamentally throw them into a canter.
Horses are not small animals, and a lot of riding a horse well is helping them find balance and squareness in all of their gaits. Asking them to take a sharp turn to the right when they are full steam ahead going into the ring, adrenaline pumping and ready to show off is a recipe for disaster. Instead, consider doing what your trainer says and go straight down the middle! If you are early in the ring, tunnel your horse right between your legs and march with a deep angle down into the far turn. Not only will your horse freaking love the feeling of it, but it will position you to be FAR away from the other competitors and more able to see who is coming in where so you can plan your next pass.
Posting through a break
If your horse is notorious for breaking coming into the ring, don’t continue to post as you come in (unless this is an equitation class - in which case, consider entering at a slower pace just to get IN the ring at the right gait. Those intermittent moments during your posting trot where your butt is out of the saddle are moments that make it very easy for your horse to wiggle and wobble underneath you. There’s a reason a lot of trainers just sit the trot through a turn with a horse that’s got a serious motor. That contact and the feel of your butt bouncing on their back actually assures the horse that trotting is what they are supposed to be doing!
Keeping with the pack
Sometimes when you enter the ring late in a big class, you can’t help but be dragged into the gravitational pull of the wolf pack cutting the corner in front of the pleasant looking ring master in a funny hat, waving his arms and pointing a finger directing them to “beware of oncoming traffic.” There is little to nothing you can do about getting covered up on your entrance, but what you can do is get OUT of there once you have entered! More often than not, if you are stuck in a wolf pack, your best bet is to head deep into the far turn and downshift a gear till they pass by and, depending on whether or not there are people coming up fast behind you, either cut the turn to get out there before you get covered up again or take the straight away solo in your brand new, lone-wolf spot!
Have any tips for how to make a clean entrance in the show ring? Let us know in the comments down below and happy riding!
Workout Wednesday: How to Warm Up Before a Ride June 10 2015
Why bother?
Well that's usually the question when it comes to warming up, isn't it? If you're like me, you skip the warm up part of your workout way too often.
But here's the thing. If you don't have time to warm up, you don't have time to work out.
Of course we all know that warming up is important, especially when it comes to preventing injury by preparing your muscles, ligaments and joints for a ride or a workout. But if you're a serious rider, the other major benefit to warming up is that it gets your cardiovascular system going so that you don't feel like a dopey slug for the first 10-15 minutes of your ride.
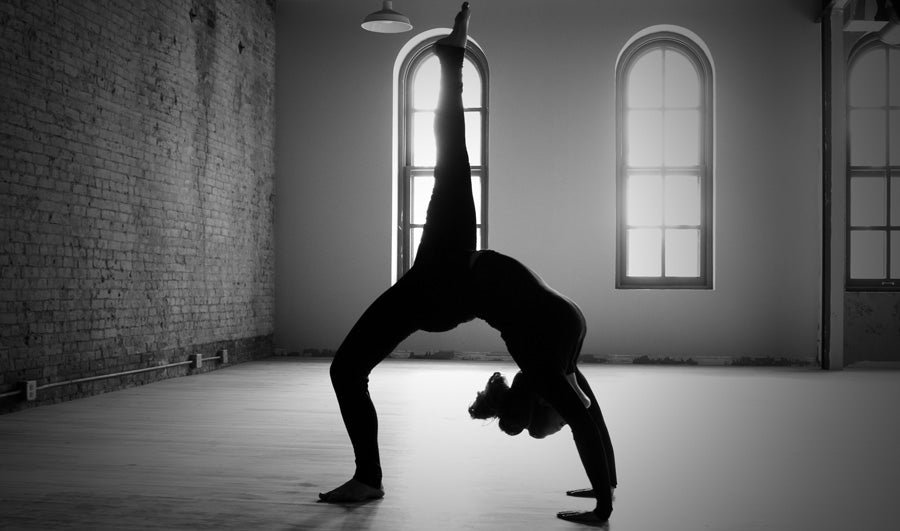
What's more, a warm up doesn't have to be as intense as the yoga/parkour shown above (awesome though it is). Here are two great dynamic warm ups to get you started.
How do I do it?
Let's start with an easy, beginner level dynamic warm up. This one just uses 10 simple exercises (with no equipment), for 30 seconds each:
Not too difficult right? And luckily, that's the kind of warm up you could get away with at the barn without looking like too much of a dope. If you want to try a more challenging warm up though, one that will really get your muscles pumping, try this great dynamic warm up from Nerd Fitness:
When should I do it?
Make sure you warm up before any intense exercise, including a hard ride, a run, and any strength training exercises.
How to Match Your Jods to Your Equestrian Personality Profile June 02 2015
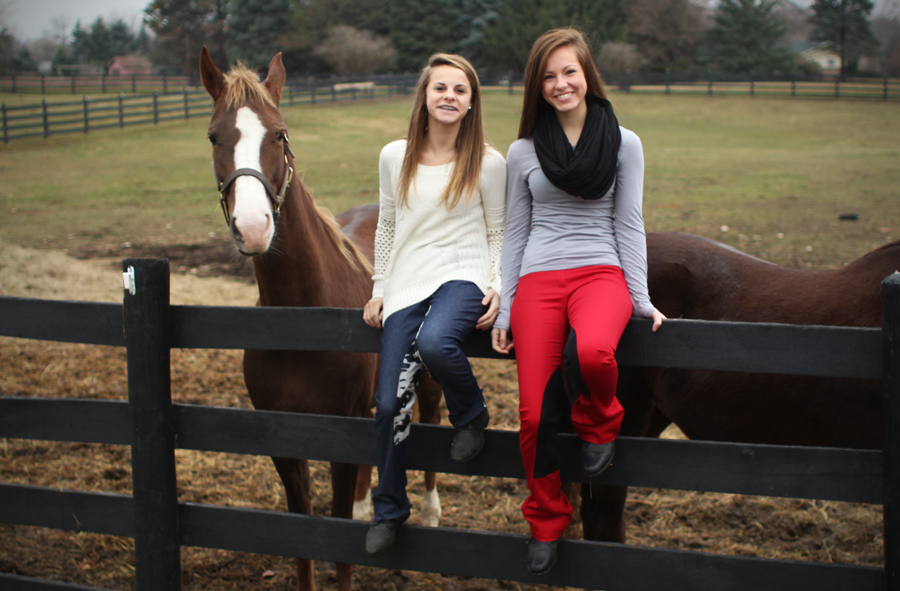
There are so many different types of jods available on the market; with new styles, fits, and fabrics for any preference surfacing all the time! However, not every type, style and fit will suit your needs. Whether you are a casual rider or a weekly equestrian warrior, you’re going to need jods. So what jod type best suits your needs? Here is a basic rundown of the saddle seat jods you can find on the market today, and what type of a equestrian lifestyle they suit best.
The Work-Hard Play Hard Weekly Warrior Meets the Bomb-Proof Polyester
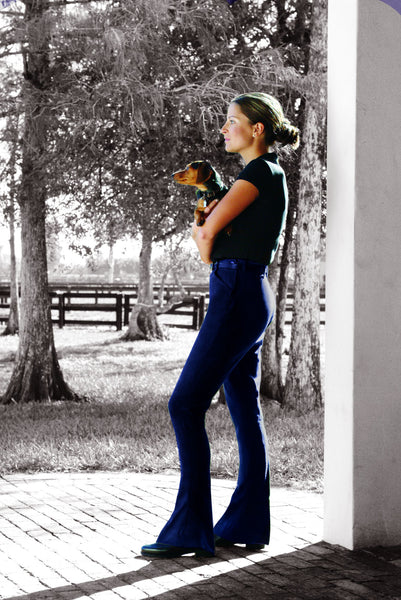
Do you not only ride, but work at the barn? Do you stack hay like a human forklift, then go practice your equitation like an elegant freaking swan? Well the bomb-proof poly/poly blend jod is for you. Not only do these jods faithfully survive bleach splashes, but also the stress of even the most serious schedule of professional equestrian hopefuls everywhere. Poly and Poly blend jods are hardy, strong and generally speaking, high-waisted (even when they say “low rise”). The main downfall of the poly jod is the lack of breathability. Somehow, without fail, working in poly jods in the middle of the summer will make your legs stick to your jods, to each other, or to anything you touch shortly after having been in poly jods - there is absolutely no air flow in a poly jod. However this is what gave rise to the poly blend! All the durability of poly jods, except breathable - ahhhhh! Check out Ovation’s durable poly-blend jod here!
The Fetching Fashionista Meets the Kool Knit Jods

When you are at the barn do you still like to look like you care? Or maybe you stop to think about what it is you're wearing before you step out of the door? If so, then the recent emergence of alternative fabrics for jods has your name all over it. This expansion into alternative fabrics has given way to the super comfy, fun colored jods with an endless variety of knee patch colors and styles. While these jods are not necessarily safe from bleach splash, they are crazy comfortable and awesome for even the hottest days on the farm. Check out Hot Jod’s Knit jods here!
The Adamant Athlete Meets the Performance Pair
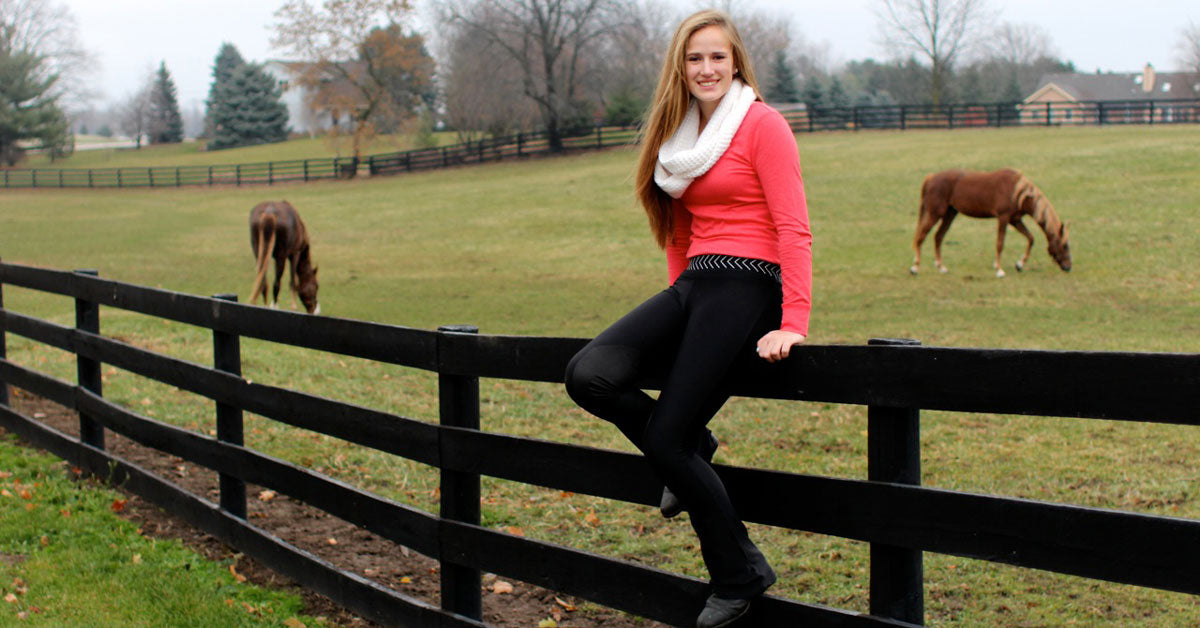
Are you the type of person that gets up before work or school to run? Do you watch what you eat and consider food to be fuel not something you comfort yourself with while crying over a totes sad netflix movie? Performance jods are for you. The rider that practices multiple times a week and works out before/after their rides needs a hybrid jod; something with the function of a jod but the capabilities of a workout pant. With more people recognizing that equestrianism is a sport (because duh…. it is), manufacturers have taken note and decided to treat it like a sport by providing us equestrians with performance, sweat wicking, compression like garments. These awesome jods are not only meant to keep our muscles in good working order while we get our sweat on, but also meant to, much like other sports-wear, keep us dry, comfortable, and less smelly than other garments; because we know that some of our gear has a definite stench…. The only downfall of performance jods is the fabric tends to be on the thinner side, leaving it very vulnerable to the devil stabs of hay bales and other stabby barn objects (straw, jagged/old stall wood, sticks out in the paddock, etc). Check out Alympic Equestrian's performance jod here!
The All Rounder Meets the Denim Delights
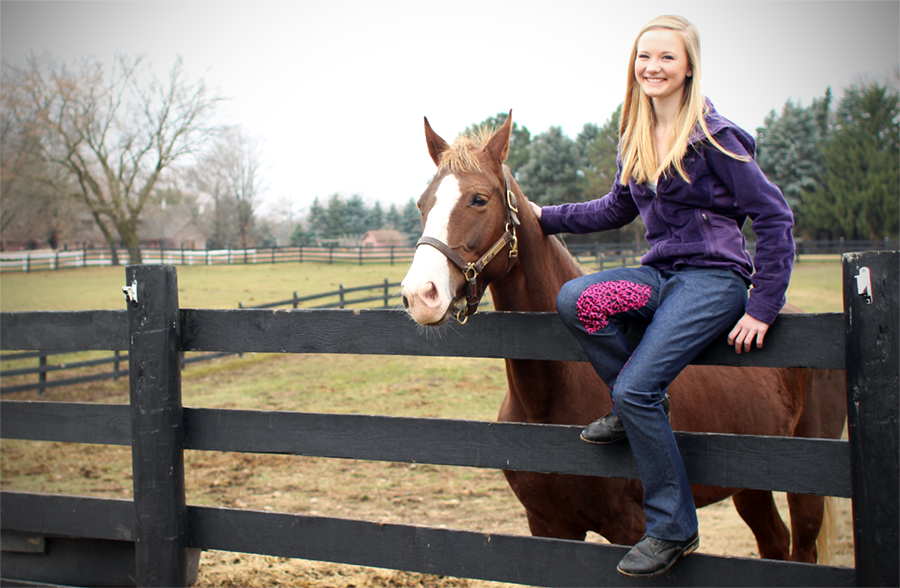
If you are somewhere in between all of the previously mentioned categories, or you just don’t like being put into categories of any kind, then this disturbingly delightful hybrid of a poly and knit jod is probably the best happy medium jods for the every-rider. Whether you are trying to be fashion conscious, or you’re working everyday at the farm and need something durable that’s got some more give to it, denim jods are a win win all around. With denim fabric originally being manufactured as a utility material for laborers, it’s hardy as can be! Thanks to the progression of fashion, denim also happens to be a fashion-friendly option that can actually seamlessly take you from barn to the real world without too many questioning on-lookers wondering: What the heck is that person wearing and why are they so dirty? The main downfall of denim jods is the tendency for dye bleeds. Just like real denim from your favorite store, darker washes will have extra dye bleeds. To avoid this, we recommend soaking any dark denim (jods or otherwise) overnight in water with some vinegar, then washing the ALONE and inside out! Check out Hot Jods’ and Ovation’s denim jods here!
Improve Your Riding Reflexes With These Three Exercises May 27 2015
Reflexes might seem like one of those things you're born with, like an outie belly button or an unnatural craving for pop tarts. While there's some truth to this, you can actually train your reflexes so that you respond more quickly when your horse decides to go off script.
To be clear, when we talk about 'reflexes', there are really three 'phases' you need to train:
- Reaction Time: This is more about time spent on your horse (and spent getting to know your horse) than anything else. Put simply - how quickly are you reacting to the signals your horse is sending?
- Response Time: Or how quickly you choose a response to these signals. Practice is a big part of this too, but you can improve your response time at the gym or at home by training your agility and muscle memory.
- Response Speed: Or how quickly your body follows your mental response. This is the biggest area where training can improve your reflexes.
Why bother?
Because every step your horse takes won’t be the same, and having good reflexes will help you adjust in your body and in your bridle to better handle any changes.
If your horse shies or overreacts to anything in the arena, you don’t want to be sitting there confused with your mouth open, following your horse’s lead.
What should I do?
The three exercises we're going to cover today each have benefits for your riding reflexes specifically. The first is a relatively simple side shuffle:
This will add strength and speed to the lateral movement in your lower body. As the gentleman in the video mentions, it's also a great metabolism booster (as are all of these exercises), for 'getting you in those skinny jeans', or if you prefer, jods.
Our next exercise - dumbbell punches- is ideal for improving the strength and speed of your core.
And as an added bonus, dumbbell punches are also a great exercise for your stability and balance.
Last (but absolutely not least) is a speed-rope exercise, which will help with developing quicker and more responsive feet.
How should I do them?
A great way to do all three of these exercises in a single session, with a huge cardio and fat-burning upside, is with a quick, high-intensity Tabata circuit (read about these in more detail here). To do so:
- Do 20 seconds worth of shuffles, then rest for 10 seconds.
- Follow that with 20 seconds of punches, then 10 seconds rest.
- Then 20 seconds of speed rope, followed by 10 seconds of rest.
- Repeat the above circuit 3 more times, for 4 total times through.
Five Tips for Being a Great Sportsperson in the Show Ring May 25 2015 3 Comments
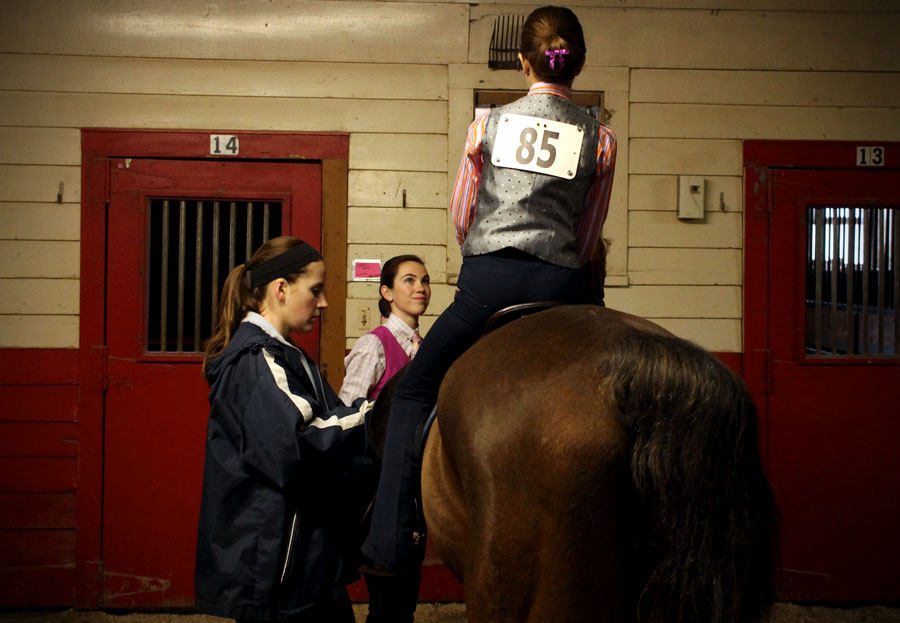
With all the hustle and bustle of a horse show, it’s easy to forget about the people around you. Your nerves take over and you become hyper focused on your job as a rider and showing your horse. But even so, you can’t forget that you are in a ring with other riders and horses, sometimes a LOT of other riders and horses. While we aren’t all lucky enough to have large arenas and group lessons to practice riding with other living and moving obstacles, there are five things that will you a better sportsman/woman in and out of the show ring.
Spacing
When you are passing another horse in the arena, leave at least another horse length in between you and the horse you’re passing. Just like with driving, cutting someone off is dangerous and irritating. Not to mention the fact that when you cut someone off using an animal that is also space conscious, you’re just asking for your horse or their horse to react in a negative and sometimes really dangerous way. While getting out there and showing your horse off to the judges is important, you also have to “drive defensively” ensuring you are always leaving yourself and those around you enough room.
Don’t call the rail
Unless your horse is literally out of control, in which case maybe you need to be excused, do not call the rail when someone else is already on it. It is your job as a rider to actually steer your horse and if you aren’t on that level, or you're unable to accomplish that with a particularly challenging horse, then it may be better for you and everyone involved if you just opt out of showing until you and your equine partner are farther along in the process.
Lose gracefully
If you didn’t have the best of rides, or even if you did and you just didn’t get in the ribbons or as high as you felt you deserved, keep that to yourself. There is nothing worse than a Pouty Patty. Scowling in or out of the arena, crying, or making dramatic scenes of your distaste are all things that make you look like a sore loser. All of those things are acceptable every now and again, but in private. Disappointment is a part of being in a sport where there is only one winner, but being a good sportsman/woman means losing with dignity and grace.
Don’t heckle
Intentionally sabotaging or undermining the confidence of other riders is not cool. While this tip seems incredibly obvious, it is true that some out there feel it is appropriate to tell riders to “change” their diagonal when they are in the ring to the WRONG one in an attempt to sabotage their ride. When you do things like trash talk, treat people rudely or like they are less than you are, it really only makes you look small, petty, and worried about your actual ability to ride. While we know things like this “go without saying”, if someone doesn’t say it, how would anyone ever know it!?
Acknowledge and be grateful for the congratulations
If you are in the line-up and your name is called and the rider next to you offers congratulations, do the right thing and say “thank you.” If you are outside the ring and someone says congratulations, always say “thank you” because disregarding a kindness like that is incredibly unsportsmanlike and practice all too often employed.
So let’s always take the high road, treat people equally and fairly, and ensure we are courteous in all facets of life, but especially when large, unfamiliar animals are involved.
Have any experience of unsportsmanlike conduct, or pointers for great sportspersonship? Let us know in the comments down below!
A Beginner's Guide to a Saddlebred Horse Show May 19 2015 9 Comments
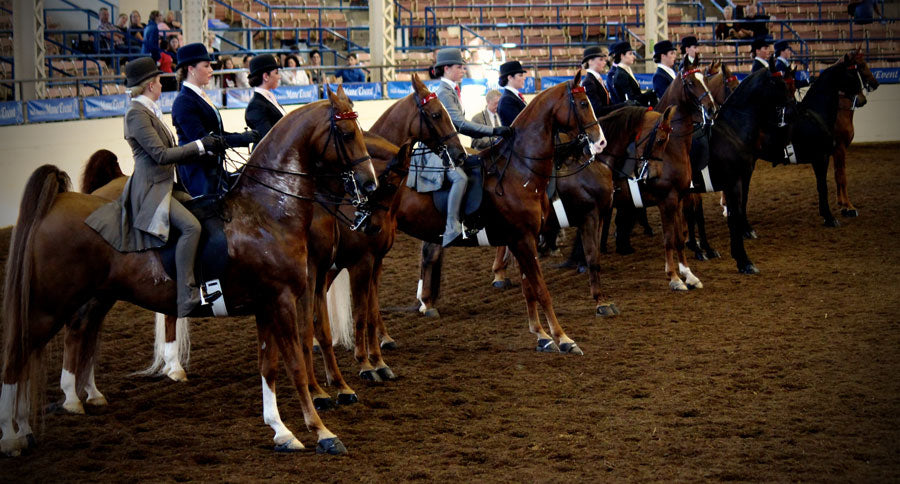
Being in the Saddle Seat industry, it can be really hard to explain why we love our sport so much. But the struggle is even more real for horse show newbies. For them, it can be borderline impossible to actually turn up to a horse show and figure out what’s going on.
How did they decide who won that class? Why are people yelling? And what’s with the organ music?
Riding disciplines like racing and jumping can be fairly easy to understand from a spectator’s point of view; cross the finish line first, or go over all the jumps fastest, and you win the ribbon. Saddle Seat, however, is a different beast entirely! There are so many different divisions to figure out. You don’t win if you are the fastest, you don’t win if you jump the highest, and even if there is a pattern to do, there’s also a rail work portion to figure out.
So, with all that said, here is quick beginner's guide to Saddle Seat horse shows, with questions provided by Tom the horse-show-neophyte.
When I watch a class, what should I be looking out for? What’s good horse form look like? And what does bad horse form look like?
Generally speaking, at a saddle seat show, you want to see a look of ease. Each division asks for different specifics - things like five gaits instead of three, a pattern, or showing at the flat walk or halt.
However, generally speaking, the most attractive horse with the most clear look of ease in the horse AND rider is the one that’s going to take the cake. These horses love their jobs and even if their riders are working really hard to keep their horse contained when it wants to leap for joy, the idea is that the rider also looks like they love their job! Equestrians everywhere have heard it before: “riding isn’t even hard, you just sit there” well in saddle seat (a sport in which that is not even REMOTELY true), that can be taken as very high praise!
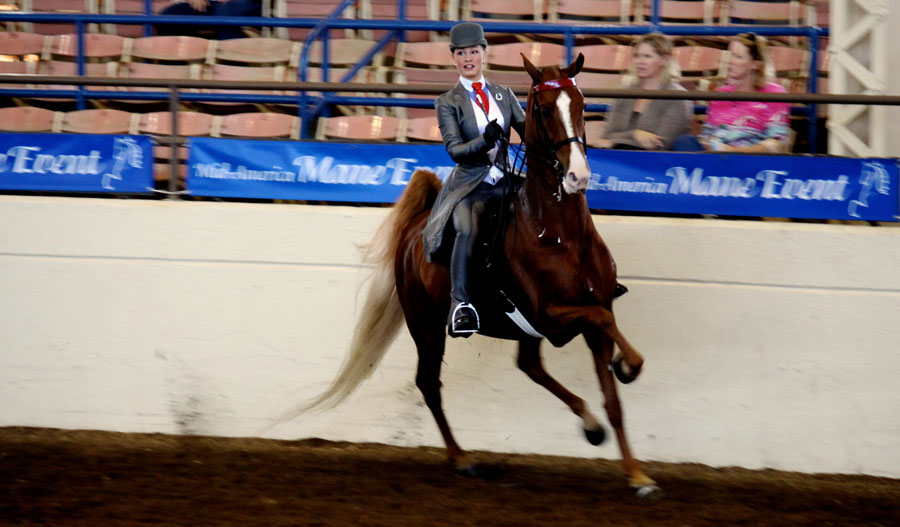
What kinds of classes are more about the rider than the horse? What should I be looking for in those classes? What’s good riding form look like? What does bad riding form look like?
Equitation classes are more about the rider than the horse. Equitation also has a variety of sub classes - i.e. pleasure equitation, saddle seat equitation, adult equitation, etc. In a class like this, you want to see great posture! Nothing absurd or crazy, but great posture just like you’d observe in someone walking around the city, upward gaze, shoulders down and back with clean confidence in their movement. This of course does not mean stiffness. Just like with good posture in life, stiffness is not only uncomfortable, but it is also uncomfortable to look at. The only thing that’s really different in saddle seat is the leg position. An easy thing to remember for new spectators is that there should be a straight line from the competitors shoulders, down to their hips, down to the back of their heels.
In classes where it’s all about the horse, won’t the most expensive horses just end up winning?
While financial investment plays a role in all equestrian sports, as well as all sports that rely heavily on “equipment” (in this case a beloved equine partner), behavior and riding ability has a huge effect on whether or not a horse can perform at its best. Depending on the division, a horse that costs well into the six figures may not be able to win a single ribbon simply because that horse does not like to flat walk or halt. If classes are large and there are a number of quality exhibitors that have great rides, if the most expensive horse in the class ends up buried by its competitors, it could easily be overlooked by the judges for a far less expensive horse that has a rider with ring sense/more showmanship. There are a number of factors that play into how well a horse does in any given day, but having the most expensive horse does not buy you a ribbons!
How about the classes in buggies? How are they judged?
Classes with jog carts or fine harness carts are typically pleasure and are judged by the same standards as other performance divisions. The horse that looks the happiest, that performs their required gates, and is seen by the judges will be the winner!
What are all those people in the stands yelling about?
As my Aunt Phoebe said at her first experience of a saddle seat show, “What is this? A tourettes convention?” The intermittent yelling and screaming of phrases like “YA BOY” and “YEEEEW” are just examples of some of the things you might be startled by at a saddle seat show. The reasoning behind this behavior is really quite simple: the horses they are yelling for are show horses and they LOVE to feel the crowd appreciating them. There’s nothing like crowd support to make a horse get bigger in mind and body than you’ve ever felt before! They love attention, they love to be admired, and cheering is the easiest way for them to understand you, as the audience, are appreciating their beauty! So be sure to pick a favorite and let a “ya boyyyyy!” out when you get to your first saddle seat show.
Have any questions about what’s going on at a saddle seat show that we missed? Or can you add anything to the answers we provided? Comment down below!
Breaking Down The Good Hands Figure-Eight May 05 2015 1 Comment
Last week, we took an in-depth look at one of the Saddle Seat Equitation Triple Crown Finals’ qualifying class patterns. This week we’d like to highlight the qualifying class and Phase I pattern for the first jewel of the Triple Crown, The Good Hands Final. The thing that’s so wonderful about The Good Hands Final is that the qualifying class pattern (which is also the pattern for the first Phase of the finals) is surprisingly (and enjoyably) ambiguous.
There are specific instructions: Trot from the line-up (or into the ring, if it is during the finals themselves) on the correct diagonal to the center of a figure-eight. Canter a figure-eight. Trot to the judges stand, stop, and back three steps. Continue trotting to the line-up (or out of the ring).
What they don’t tell you is exactly HOW you have to accomplish those parts. It allows not only for the typical show of skill and athleticism, but also for some individuality! While this pattern is a less stringent one than you would expect from the average equitation class or finals, there are still only two options for how to complete the pattern.
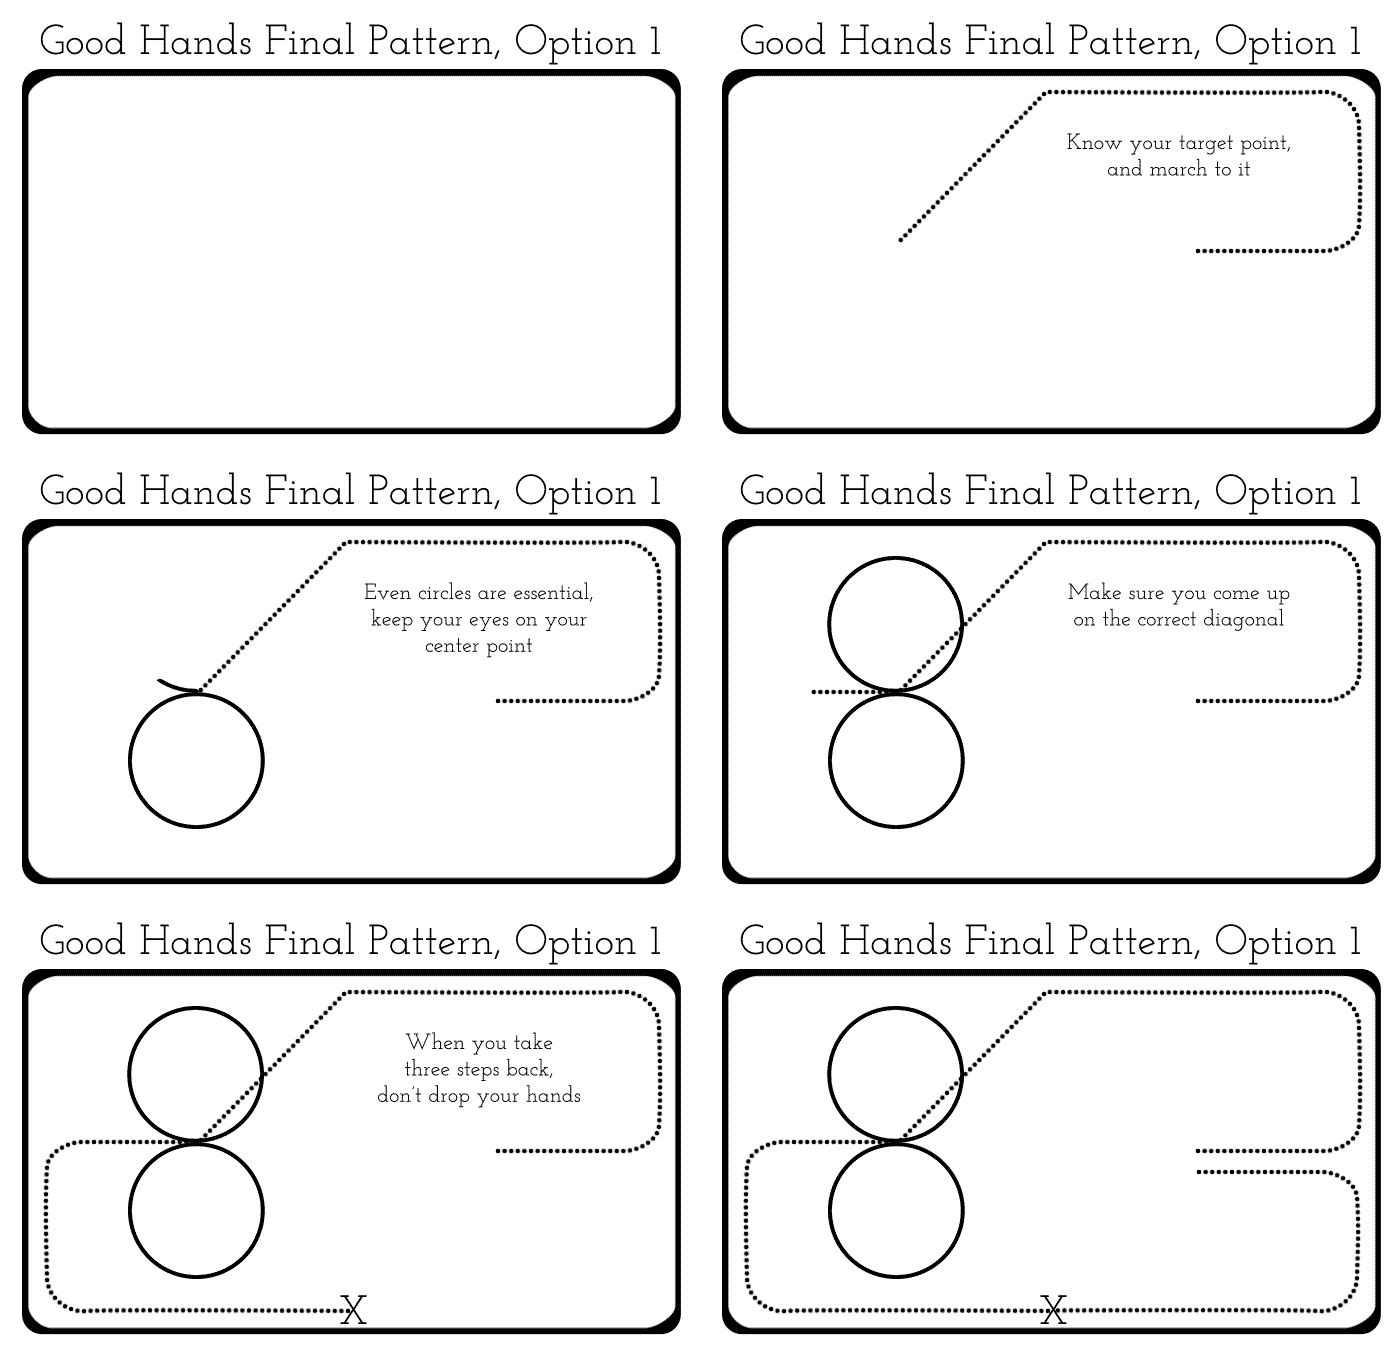
This is the more fluid of the two options. There is less stopping, pivoting and “slow-moving parts” so if you have an equitation horse that is less finished or perhaps more on the game side, this is the best option for you! In looking at the graphic, you can see that the only stopping is when you pivot onto the center of your figure-eight and when you stop to back your horse at the judges stand. SO!
- Step 1: Trot down the rail on the correct diagonal marching the entire way through. We can’t stress enough how important it is to push your horse up to the bridle at all times! It is essential to maintain good carriage and a light feel in your hands.
- Step 2: At the halfway point of the rail, angle into the center of a figure-eight and continue to press your horse forward into your bridle all the way until you reach that point. Nothing like a slow meander up to your center to really make your pattern appear weak and sheepish.
- Step 3: Pivot onto the center of your figure-eight and begin by cantering a circle to the left. Fun fact - any figure-eight, whether it is trotting or cantering, will always start to the left unless specified otherwise! Turn your eyes and head toward your figure-eight center and allow your hips to direct your horse around the lovely, round, circle that you are no doubt creating.
- Step 4: Canter your circle to the right and be SURE to keep it even. If your circle to the left was larger than expected, your circle to the right must be equally as large, and (if you’re asking us) we choose to err on the side of a larger circle, as making a circle equally as SMALL can be not only physically uncomfortable for you and your horse, but also visibly uncomfortable for the judges AND the audience.
- Step 5: Trot, on the correct diagonal out to the rail and around the turn to the left till you are at about the halfway point (or near to the judges stand where-ever that is geographically located in the arena, usually about halfway) and stop. Here is where you back three steps, a pattern request we have yet to discuss. Often made mistakes: too much curb, dropping your hands, yanking too hard and too suddenly on your horse’s mouth. When you ask your horse to back don’t change your body position or suddenly decide that your horse is 10X stronger in the bridle than they’ve ever been before. In fact, just don’t over think it. Ask your horse to back as gently as you would in the line-up of a pleasure class.
- Step 6: Finish strong and return to the line-up/exit the ring, once again, on the correct diagonal!
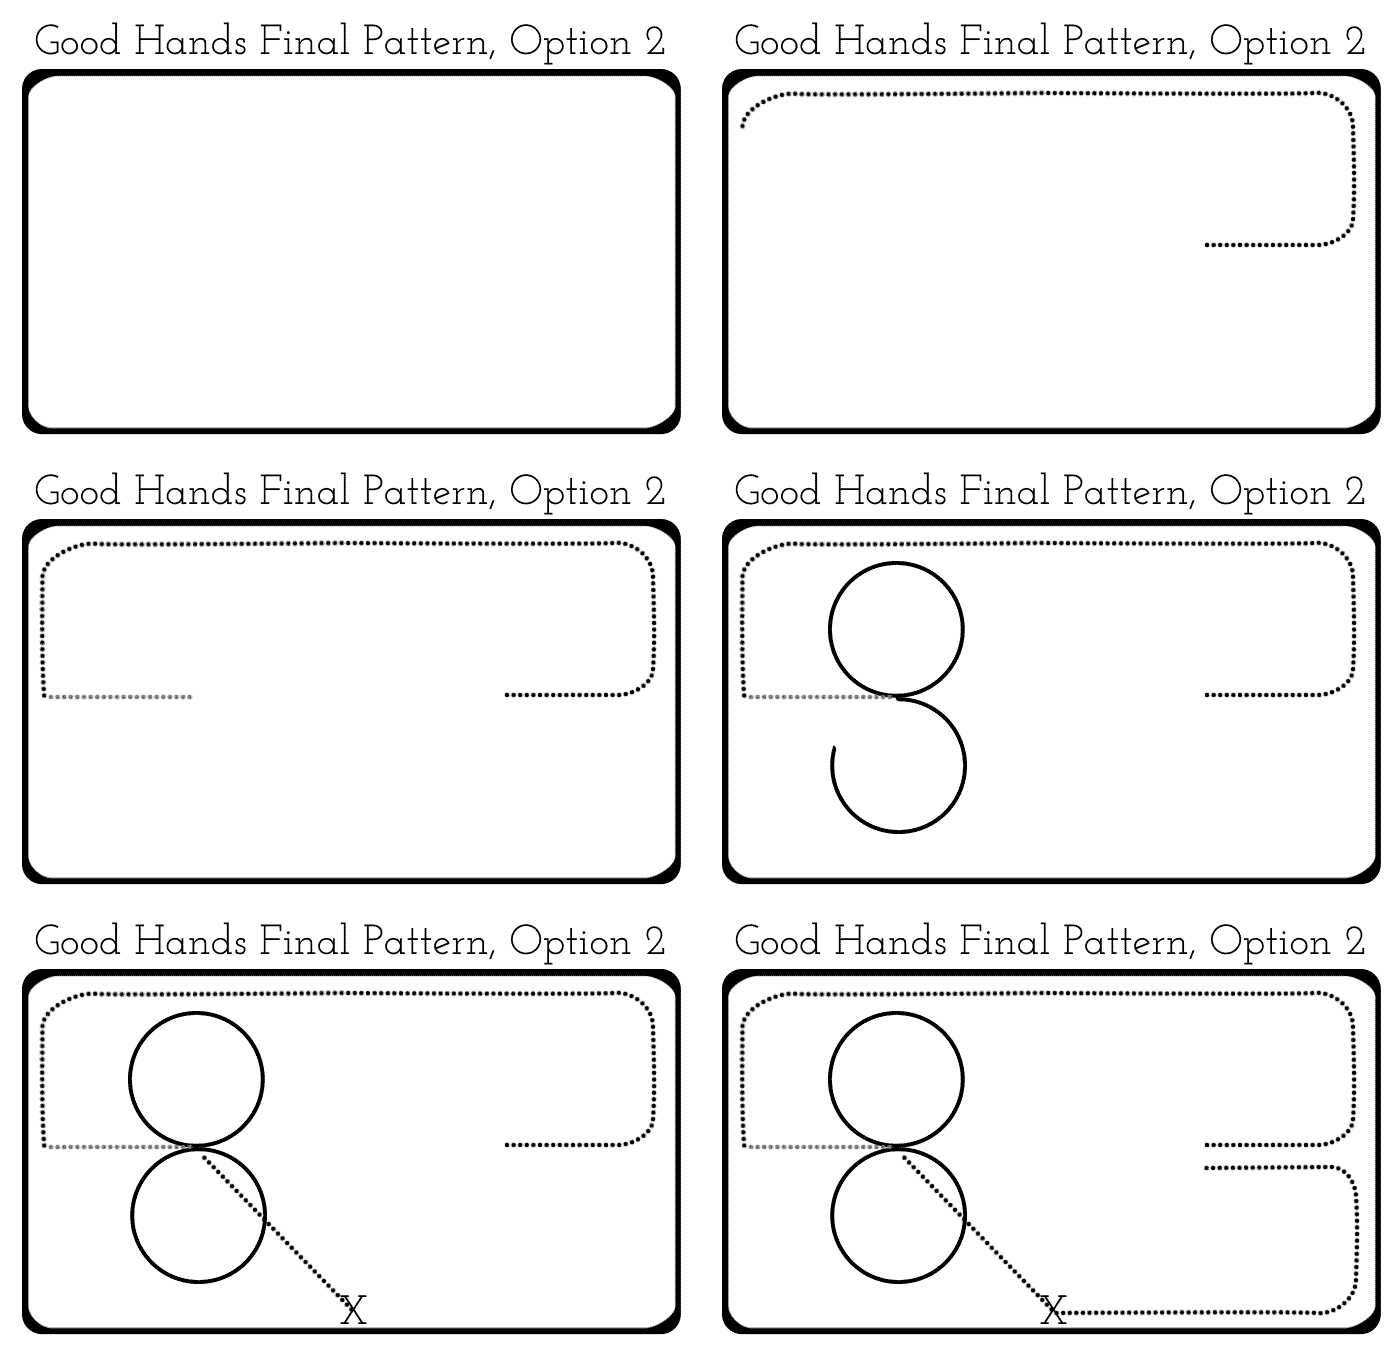
This option is for the rider that prefers a “cleaner” appearance to their pattern, has a more finished eq horse, or just really likes to pivot. This also means that you have to have the accuracy of hawk diving for its dinner because if any of your stops/points are off, you will skew your entire pattern. SO!
- Step 1: This is the same as Option 1
- Step 2: Instead of angling into the center of a figure-eight here, continue into the center of the turn where you will stop, pivot 90 degrees to the left (toward the center of the arena) and begin walking into the center of your figure-eight and stop.
- Step 3: Just like the Option 1, begin by cantering a circle to the left, only this time, your figure-eight is facing into the arena instead of facing out toward the stands. The equal circle tips still apply!
- Step 4: This is the same as Option 1 - especially that whole VISUALLY painful thing if your circles are TOO small!
- Step 5: Your exit/finish here is a little more direct than in Option 1. Pivot onto a diagonal line toward about the halfway point of the rail and pick up your trot on the correct diagonal. You can either stop AT the halfway point for your back or literally at the judges stand. There is some debate about this that is mainly solved by where the judges themselves decide to stand. Either way, keep a clean transition by maintaining your horse’s carriage and keeping your weight low because you’re about to do that transition about 10X closer to the judges than usual. Back your three steps utilizing the tips previously mentioned!
- Step 6: This is the same in EVERY pattern, finish strong and trot on the correct diagonal back to the line-up/out of the ring.
So while this pattern has more options, it requires all the tips previously discussed to keep from making simple mistakes during the pattern. Now head out there and get yourself qualified for this year’s Good Hands Finals!
Which option do you prefer? Tell us in the comments down below!
Four Easy Stretches to Prevent Equestrian Injury and Improve Your Riding April 29 2015
Why bother?
If you’re like me, you kind of treat stretching like you treat flossing; you only stretch when you’re already injured - just as you only floss after a stern talking-to from your dentist. Either way, it’s too late.
This is as true for equestrians as is it for any other athletes - if you approach stretching just as a way to rehab or prevent injury, you’re missing out on a lot.
Firstly, stretching is a great way to improve your flexibility, and improved flexibility will help you look more natural, relaxed and controlled whenever you ride. But an extra benefit of stretching is that, in improving your range of motion, it’s also a great compliment to any strength training.
Let’s take a look at some stretches to improve flexibility and range of motion, and help prevent injury, in five areas that equestrians consistently put under strain:
- Lower back
- Hip flexors
- Calf and Achilles
- Hamstrings
How do I do it?
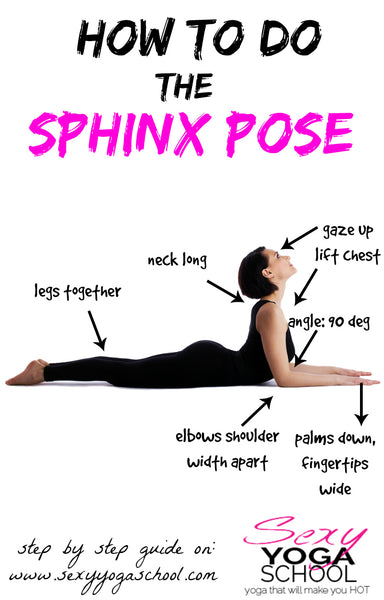
Stretch your back by starting with a Child’s Pose. Hold for at least thirty seconds, before moving gently into a Sphinx Pose.
Stretch your hip flexors with a simple kneeling quad stretch. Make sure you keep your hips pushed forward throughout, and for your first few times with this stretch, feel free to adapt it by keeping your back foot on the ground.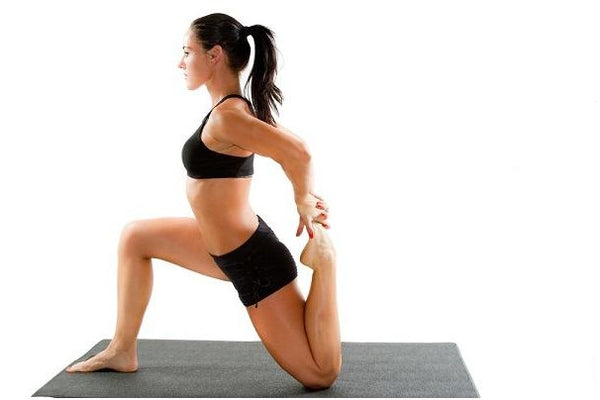
Stretch your calf and achilles with a simple wall stretch. Make sure to hold each stretch (forwards and back) for at least 30 seconds.
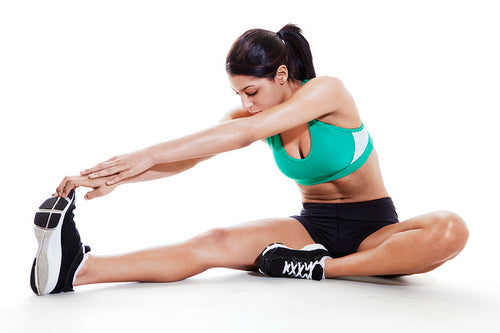
And finally, stretch your hamstrings by touching your toes (or getting as close as you can). And don't bend your knee!
When should you do it?
Stretching before a workout is like red wine or coffee, in that one day it’s great for you, then next day it’s...not so good. With static stretches like these ones, it's probably best to do them at the end of a strength training session, or on their own.
Five Steps to Perfect the Serpentine April 28 2015 1 Comment
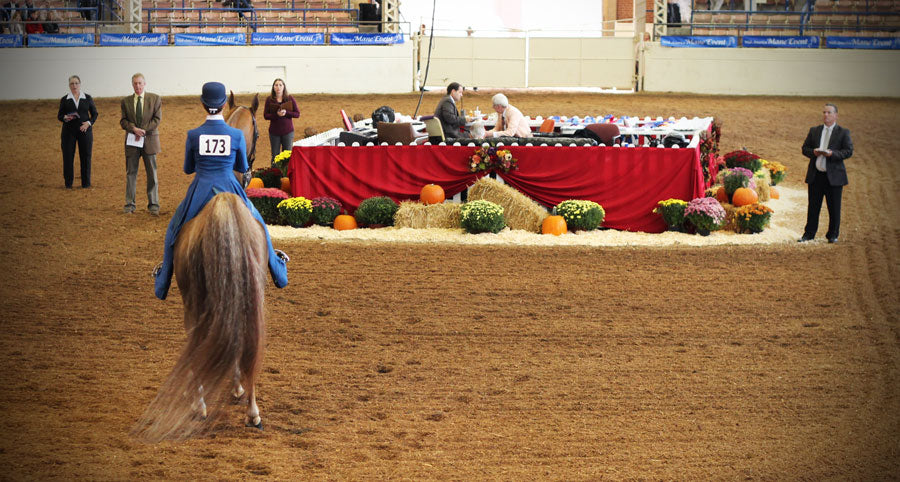
With show season getting into full swing, there are qualifying classes at every show until finals time. This means you had better get your stock patterns up to par if you want to secure a qualifying First or Second place…
..and then you can deal with the stress, the joy, the early mornings and long days, and demanding levels of athleticism that come along long day, and incredible level of athleticism that come along with equitation finals.
Let’s start with a classic, learned early in a rider’s training - the rinse repeat style pattern that is the UPHA Serpentine - better known as the workout at the end of a UPHA Challenge Cup class!
Step 1: Find Your Points
Nothing is worse than having bad geometry when performing a serpentine. It literally ruins the WHOLE THING and will make it crazy challenging (harharhar) to get your serpentine back on track, if it’s possible at all.
SO, whether you are a veteran or a first timer, FIND. YOUR. POINTS.
This includes your serpentine edges and your diagonal change points. If you are a froshie/maiden/newbie/n00b/whatever….someone that hasn’t done this before or often, your trainer will likely walk the pattern in the arena with you, point out good spots to use and help you identify little triggers to give you the best chance at success.
However, if you are a vet/a been there done that/an experienced equitation star, your trainer may no longer walk this pattern with you (unlikely, but possible). If that’s the case, you have GOT to take the time to walk around the arena (if it is open before or after the show) or around the stands to identify those points. Every arena is different and some arenas have confusing, trick center points (we all know that the outgate in the arena at Midwest Charity is not the center of the turn…. ruuuuude). Don’t let false centerlines throw your pattern off!
Step 2: Two-Step Your Way to a Beautiful Shape
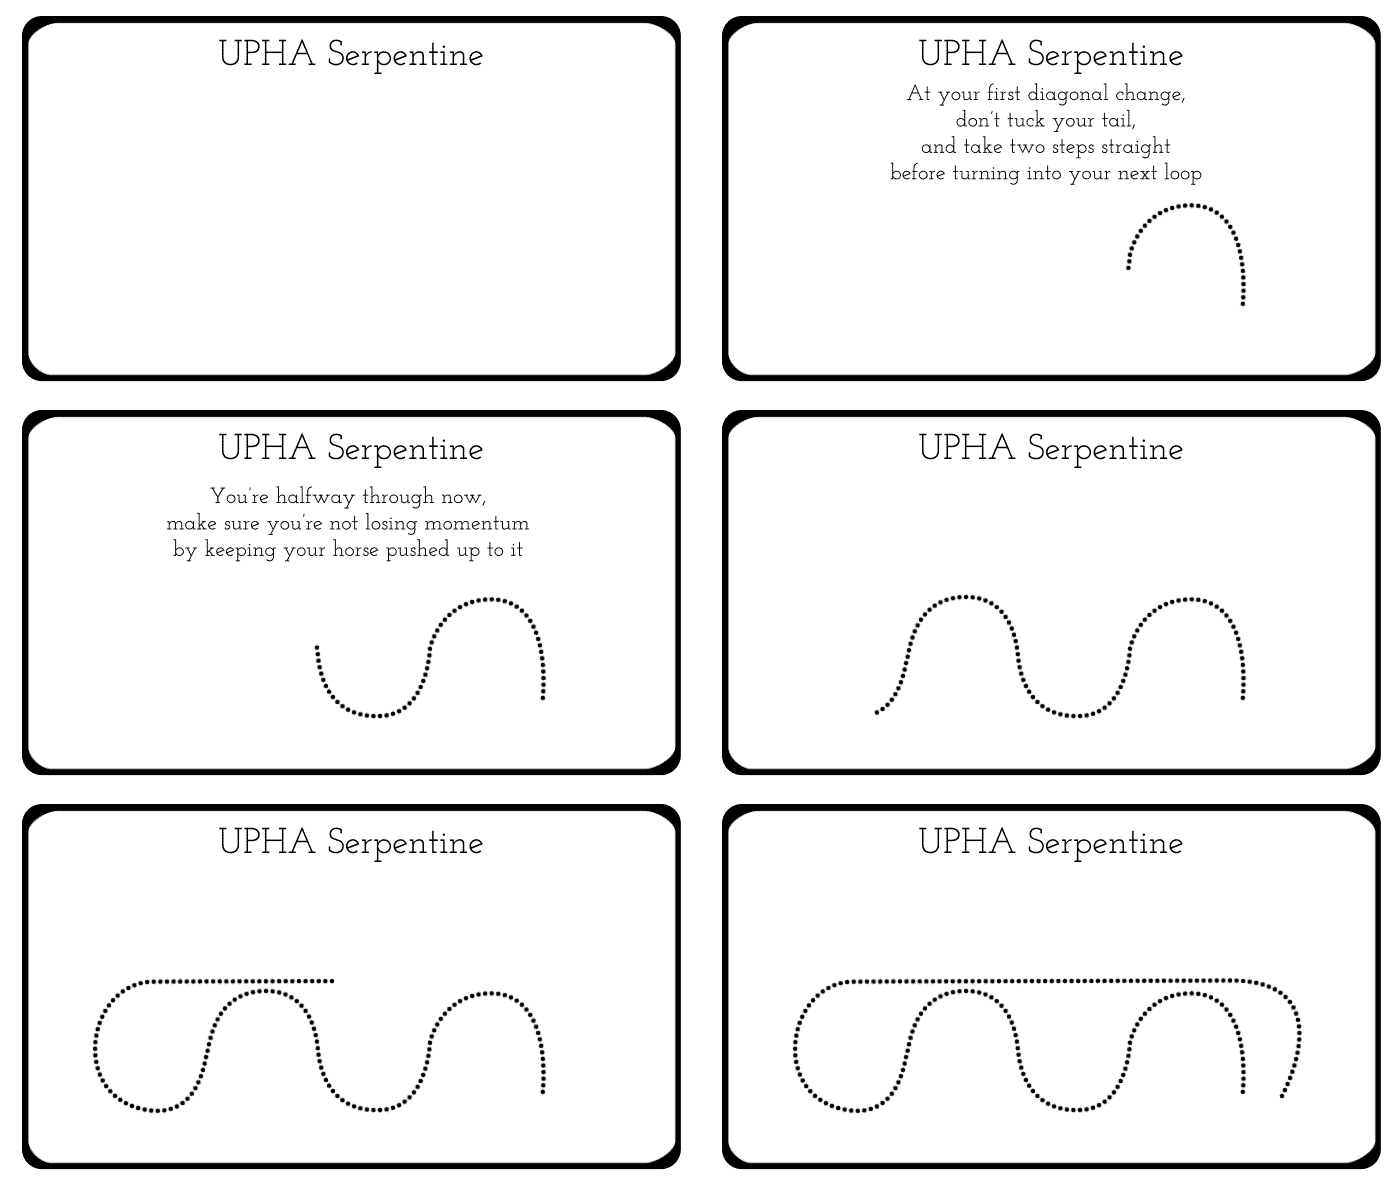
After each loop and diagonal change, take two steps straight before you allow your horse to curve into the next serpentine loop. Nothing is more awkward than a serpentine that is not deep enough…it looks more like a sad little ripple in a pond than it does a serpentine, yuck. Taking two steps straight after your change will allow for more definition in your loops and keep your serpentine from looking like a yuck little ripple.
Step 3: Don’t Tuck Your Tail
We have talked about this issue before and it is a SERIOUS mistake for this pattern. With a total of three diagonal changes in quick succession, not only will all of your changes look awful and be super obvious, but you will probably actually throw yourself out of your horse's rhythm and slow your horse down too! Which brings us do our next point...
Step 4: March, March, March!
For the love of all that is holy PLEASE push your horse forward through this pattern! That does not mean run your horse off their feet. It means ride their back legs by clucking them up to the bridle and keeping them from losing momentum. There’s nothing worse than hearing the audience cluck FOR you because your horse has slowed so much that, by the last loop of your serpentine, it looks like you’re both wading through a swamp together.
Step 5: Finish Strong
By now you’ve made it past the serpentine loops and the diagonal changes so all you have to do is LEAVE! Well, that’s not as easy as it sounds. Just like in your serpentine, you have to push your horse forward. Plodding through your final trot down the straightaway is a surefire way to bore the crap out of the judge, and probably yourself a little bit. However, this is the perfect opportunity for the judge to scrutinize what is fundamentally a brief “solo” rail work so don’t stiffen up, repeat step four in your head, maintain the luxuriously beautiful and meticulously practiced leg position that we are certain you have had the whole time, and ooze with confidence! The pattern isn’t over until it’s over!
So get out there and compete in a UPHA Challenge Cup Class and get qualified for a final! You’ll find that with practice, you will be up to the challenge.
Three Pilates Exercises to Improve an Equestrian’s Balance April 21 2015 1 Comment
Why bother?
Because having great balance will make you a WAY better rider. Great balance goes a long way to helping you maintain that perfect riding form that we all strive for.
But what can you actually do to improve your balance?
When it comes to your musculature, your balance mostly comes from your core. But when I say core, I mean your whole core, not just your abs, but your obliques, erector spinae and other often neglected muscles in your sides and lower back.
And as countless infomercials have probably told you, thousands of crunches are a pretty ineffective way of strengthening your core.
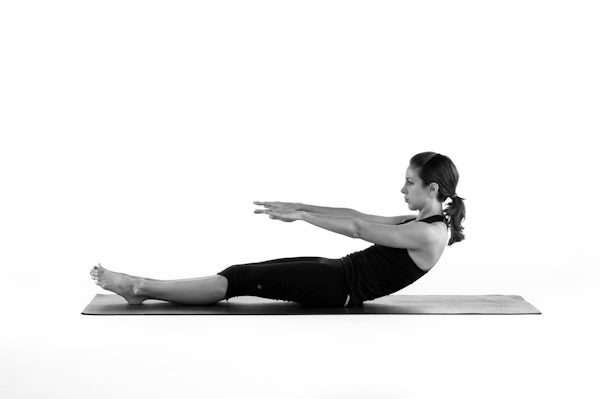
Enter three great pilates exercises - The Hundred, The Roll Up and The Hip Twist.
How do I do it?
These dynamic exercises are best illustrated through video. Let's start with The Hundred. As with many workout videos, there's a lot of needless preamble, so feel free to skip to about a minute in if you just want to see the form for the exercise.
Complete five up and down beats of the movement ten times, for a total of a hundred (see what they did there with the name of the exercise?)
Next it's time for The Roll Up. Once again you can skip to about 30 seconds in.
Complete ten repetitions of the roll up before moving to the next exercise...
...which is The Hip Twist! Once again, feel free to skip ahead about 30 seconds.
Complete ten repetitions on each side.
These three exercises can be treated as a mini circuit. Do each exrercise one after another. Do three to five sets of the circuit, with 60 seconds of rest between each set.
When should I do it?
These exercises are great as a stand-alone workout, or following a session at the gym.
How to Canter Like a Pro in Five Steps April 20 2015 8 Comments
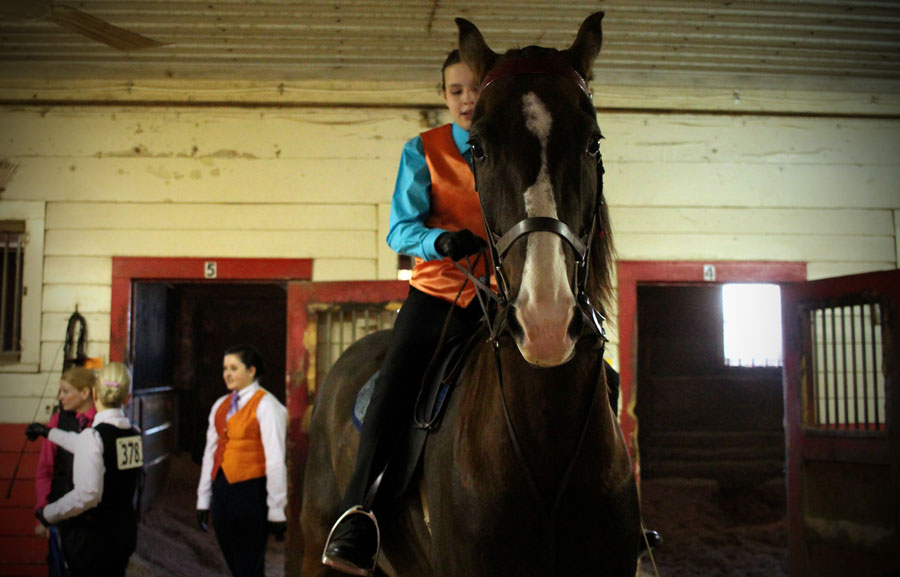
The expression goes that you should learn to walk before you try to run. And unless something has gone horribly wrong, you’re just as unlikely to see a toddler in a marathon as you are to see a beginner rider starting out at a canter. Instead, beginners will start out in riding lessons that are meant to help master the trot before starting on the canter.
But whether you’re a beginner or an advanced rider, we’ve all got room to improve when it comes to any gait, canter included. Here are some tips to help you reach the next level.
1. Compose Yourself
A big one for beginners, make sure you organize yourself and your horse before you even ask your horse to canter. If you just SURPRISE your horse by yelling “CANTER” at them soon as your teacher asks you to go for it, he or she will be incredibly confused (maybe even alarmed) and have a hard time giving you what you want. When it’s finally time to step into that canter, take a moment to walk yourself through the steps of what comes next as if it were a little mantra (outside hand, outside leg, and then ask), and ensure you have your horse’s attention by sliding your bridle around and asking them to walk right up to it.
Then if you insist, you can yell “canter”. But it’s probably better to just ask nicely…
2. Follow Through
And follow through for longer than you think you need to. Many of the school horse whizzes that we learn to canter on are captains of quitting. In fact, your lesson on them has likely disturbed their afternoon of sleeping in the round bale outside so…. ya know…in their minds, you deserve to be quit on. Following through means continuing the “asking” stages of the canter queue past the point of your horse stepping into it. If you remove that leg and discontinue use of that outside hand when you feel the first step of that lovely rocking canter, Buster-round-bales will say “uh uh, honey” and drop right into a nice little trot for you.
Now this doesn’t mean you should kick your horse and jam the outside rein down their throat. Rather, it gently but firmly reminds your horse that you are seriously, well and truly asking them to canter and that you will keep asking until they give you that canter!
3. Collection is Key
Maintaining your horse’s carriage by using that bridle and pushing their back legs up to it is key to keeping them from quitting on you. The second your horse stretches out like a piece of putty, the easier it is for them to drop into the trot. Use your core to sit back and down so that you can effectively use your bridle to keep them together and don’t forget to get the push from their back end that will allow you to ask for more carriage.
4. Hula Hoop Those Hips
Just like when you swing a hula hoop around in the yard, those loose whirling hips are essentially what you end up doing during the canter to get a smooth, effortless canter. Relaxing your hip flexors and sitting down in that saddle will keep your canter from traveling up your back and from giving you the appearance that you’re riding a bucking bronco.
5. Relax
This is a big next step in your equestrian training. You’ve probably been counting down the days till this moment, but here’s the thing: the first time you canter, a big, silly smile will creep across your face and all your nerves about being perfect on the first go will drip away because, above all else, it’s REALLY fun. You will make mistakes and you will probably feel stupid more than once, but that is a necessary part of learning and growing, so just relax and enjoy!
Have any ‘first canter’ stories? Share the with us in the comments down below!
The Five Characteristics of a Great Horseman April 13 2015 2 Comments

Albert Einstein famously said that “genius is 1% talent and 99% hard work.” The same is true for today’s great horsemen and women, who take their natural ability, and through perseverance and personal development, work to bring this industry the renown it deserves. We are lucky enough to witness a number of incredible trainers today, having learned their trade from some of those original greats, but what are the specific characteristics that make them such great horespeople?
Patience
Some horses take a lot of time to develop or learn. But any trainer that gives up at the first sign of resistance is selling their horse (and themselves) short. Great horsemanship means repetition, repetition, repetition. And yes, it can get INCREDIBLY boring at times to do the same old thing, day in and day out, but sometimes, that’s what that particular horse may need.
Meanwhile, unfortunate horses who have had bad experiences in the past can hold onto that trauma and may need an incredible amount of patience to overcome their feelings of fear and learn to trust again, so BE PATIENT!
Thinking outside the box
Sometimes it takes an “Aha!” moment to really understand what is going on in a horse’s mind. Sure, there may be occasions where you’ll never figure it out, but if you never try other options to see what you get, you’ll have a hard time figuring it out. Just as repetition is key, knowing when repetition isn’t cutting it is equally important. Some of the greatest trainers in our history have done some pretty unorthodox things, just to figure out how to help a horse that needs a little extra help.
Positive thinking
Some horses frustrate you to the point where you want to just give up on them for the sake of your own sanity. But great trainers will often give the horse the benefit of the doubt. Now that does NOT mean that they aren’t incredibly careful when dealing with a horse that they know is a challenge (or a horse they don’t know at all), it just means they give a horse more than one chance to do the right thing before correcting them in a major way.
Calculated corrections
Everyone needs correcting at times, but great trainers know the right moment, the right type and the right degree of correction. While this is a controversial and hotly debated topic, by “corrections”, we mean the use of an extra strong leg, a flick with a crop, or slightly stronger bridle use to counteract bad behavior.
The point here is that great trainers keep their emotions OUT of their corrections. No matter how frustrated they may be with a horse’s progress, or lack thereof, they never take that frustration out on an animal. They correct what is needed, when it’s needed, rather than disciplining a horse to make themselves feel better.
Discipline
Perhaps the most obvious of characteristics, if you aren’t hard working and disciplined enough to get up early, and do what needs to be done for horse care and training EVEN when you’re tired, sick, or just plain don’t feel like it today, you’re never going to make it through show season, let alone be able to grow your training farm beyond a certain point. Discipline is the key to being great at anything and the discipline it takes to be a horse trainer rivals any other of athletic endeavor.
Have you witnessed other impressive characteristics of a great horseman or woman? Let us know what we missed in the comments down below!
Workout Wednesday: Why Goblet Squats are Perfect for Riders of All Fitness Levels April 07 2015
Why bother?
Because squatting correctly, even if you’ve done a lot of weight training, is really, really hard. And that isn’t intended in a “you’re doing it wrong” kind of way, but more in a “there are so many ways this exercise could be bad for my knees/back/soul” kind of way.
What’s more, goblet squats are a great exercise for equestrians of all fitness levels. Like all squats, they’re great for strengthening the big muscles in your lower body (like your quadriceps and glutes), and for improving the flexibility in your thighs and ankles. Goblet squats (because of where you hold the weight) are also uniquely suited to strengthening your triceps, shoulders and core, while improving your riding posture.
How should I do it?
- Hold a kettlebell or dumbbell at chest level. If you’re using a dumbbell, hold the top head between your palms, as shown above. Stand with your feet slightly wider than shoulder-width apart.
- Sit back into a squat, bending from the knees and keeping your chest up throughout.
- Keep your knees wide as you go down as low as you can.
- Keep your whole foot on the floor. Widen your stance if your heels start coming up.
- Return to your starting position, and repeat for 3-4 sets of 15-20 reps.
When should I do it?
After a stretch and warm up, goblet squats are a great way to start any lower body workout. As they allow for such a full range of movement, they’re often a great way to warm up for back squats.
Three Signs That Equitation may NOT be Right for You April 05 2015
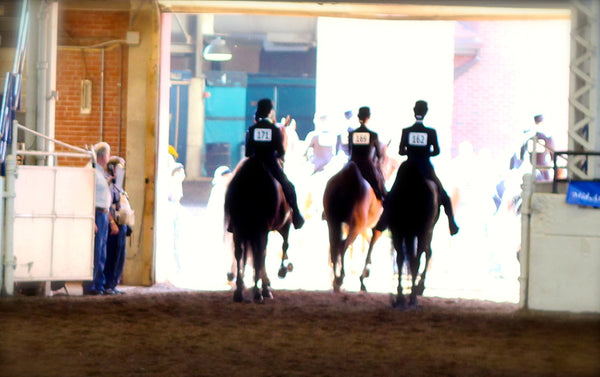
You may have seen last week’s article on the five most common equitation mistakes and thought to yourself, maybe I should try equitation? Well I agree, you SHOULD try equitation. It’s a great discipline that can improve a number of aspects of your riding ability overall.
BUT equitation is ultimately not for everyone.
In fact, I started my own “career” in the division of Pleasure Equitation and after feeling as though I was reaching a bit of a plateau, decided to take what I had learned and move into a performance division. So, how do you know if equitation isn't the best long-term fit for you? Here are three signs that may mean equitation is not the discipline for you.
1. You like to go FAST
While equitation can absolutely be the thrill of a lifetime, if you don’t find patterns to get your blood pumping, you may be most excited by being in a performance class. There is nothing like the power of a speedy and true rack or the metronome style trot of some of the greatest three gaited horses. Equitation is precise, elegant, and controlled discipline and if you have to make an either/or choice (we can’t all do both), and you have a need for speed, you should definitely turn your eye toward a performance division.
2. You don't sweat the small stuff
If you find yourself saying “yea, yea, yea” in your head when you walk a pattern with your trainer, first of all, check your attitude at the door.
Secondly, you may not care too much about the little things.
The precision of equitation is founded on the little details; hitting your center points, leg and hand position, all the way down to the rules about attire. If you just want to hop on and ride without spending too much time prepping on the ground, equitation will absolutely bore you to TEARS. Try a classic performance division like Show or Country Pleasure where your job is to ride well and be happy about it!
3. Riding more of a hobby than a sport to you
While I have a hard time relating to this mind set (as I spend six days a week with horses), some people just find the occasional weekend at the barn to be enough, or a good enough stress reliever. I say, anytime spent with horses is time well spent, but only being willing or able to commit a day every week or so to practicing may make it more challenging to follow the disciplined regime necessary to reach higher level equitation performance. It could also make it difficult to ride more exciting (and challenging) horses. Three and five gaited horses as well as park horses tend to be more of a challenge. Their intensity is what makes them suitable to those divisions.
If you seem to fit in this category, consider a driving division. Equally as prestigious, Fine Harness is a division that has seen some of the most renowned saddlebreds this industry has had the privilege to behold. You can also wear a really cool hat!
So while Equitation may seem at times like the be all and end all, you may find that another division may be a better fit. While my time in equitation was invaluable and pivotal to my learning as an equestrian, I was undeniably happy when I made the switch to a performance division. The important thing is that you feel like you're always being challenged, but also that you're continuing to grow as a rider.
Have any stories of your own on the switch to or from Equitation? Tell us how it went in the comments down below!
Workout Wednesday: Get to the Next Level with this Full Body Cardio Workout April 01 2015
Why bother?
Because it’s been a long, long (long) winter, and maybe you’re a little puffed when you get done walking up stairs. And if you’re going to get show ready, you need to be fit. We’ve already talked about the benefits of Tabata and other High Intensity Interval Training, and this full body circuit from darebee combines the cardio benefits of HIIT with a full body muscular workout.
How do I do it?
Do a minute of intense exercise for the workouts below, following each minute of exercise with a minute of rest.
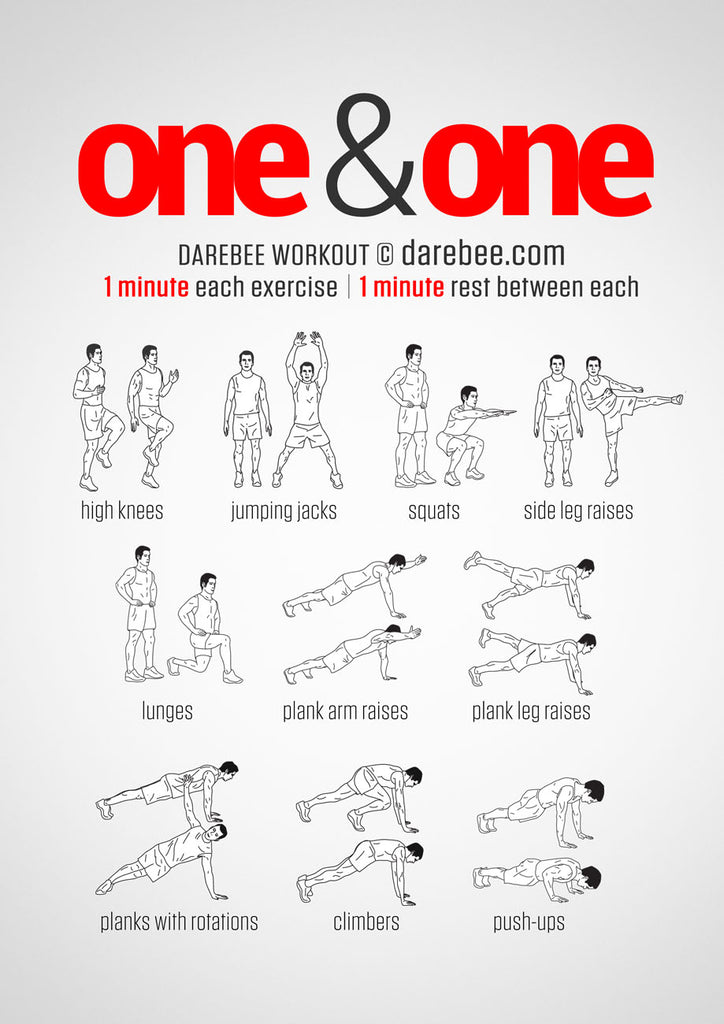
As you work through each exercise, make sure you pace yourself early on so that you aren’t a limp noodle by the middle of the workout. If you feel like you have anything left in the tank as you approach your last few exercises, be sure to put in some extra effort on the climbers and pushups so you’re spent at the end.
When should I do it?
Unless you’re very fit, this workout is likely to really push you, so it’s going to be best to approach it as a stand-alone workout, or at the end of a weights session. Make sure that you do a quick dynamic warm up before getting started.
The Five Most Common Equitation Mistakes (and How to Avoid Them) March 29 2015 7 Comments
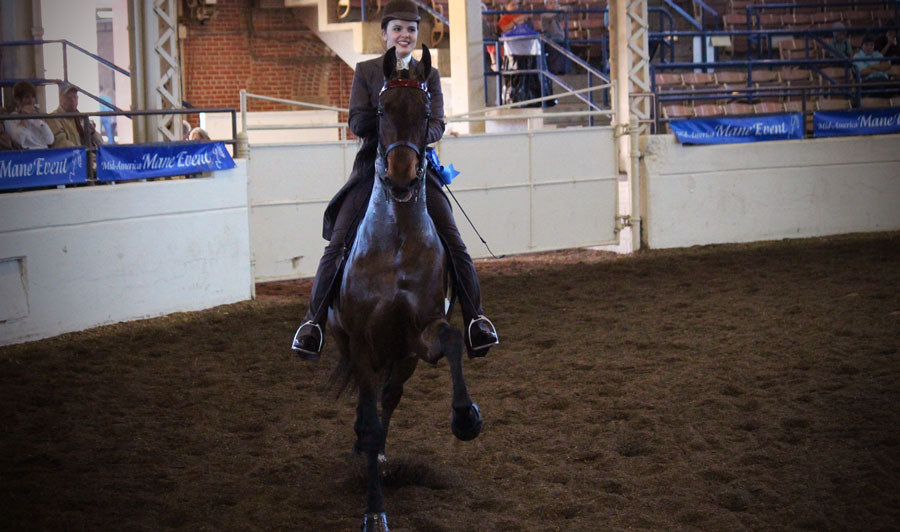
With show season underway, this year’s equitation finals will be STACKED with talent and athleticism. While you are preparing for your age group classes and your qualifying finals classes, keep in mind the most common equitation mistakes that junior exhibitors will make. Avoiding these mistakes won't guarantee you a win, but they'll be sure to set you up for success.
1. Stiffness
Any rider should always be mindful of their form. But when you’re thinking really hard about keeping your legs in position, your eyes up, and a gentle arch in your lower back, you can end up looking like Franken-Rider. Don’t send the villagers scrambling for their torches because you’re riding chin-first with your neck and shoulders so tight that you could be pushed off your mount with one finger. RELAX GUYS!
Being stiff will not help your form, in fact, locking your body into position will make it nearly impossible to keep your form during a fluid canter, or if your horse miss-steps or sees something on the rail that spooks them. Breathe, relax your shoulders down and please do not stick your face out to compensate for keeping your eyes up.
2. No Stirrups = No Form
The number one problem for Senior Equitation competitors is no stirrup work. This will make or break your pattern. Firstly, you have to put in the leg work (harhar) at home. There’s no way you can accomplish a good stretch of no-stirrups in a pattern if you aren’t legged up. Secondly you have to keep your balance in your butt. Often when we are unsure of our ability to ride without stirrups, we tend to get stiff and lean forward, but that will throw you right off the sweet spot of balance on a saddlebred. Keep your shoulders over your hips and think about keeping that post nice and low. Finally, don’t contort your legs super far behind you. As we discussed above, when we ride without stirrups, we tend to get so worried about how our legs look that we’ll contort them too far behind us and jack our ankles out, thinking that our legs look FAB!
They do not.
They look terrible.
Getting your legs too far behind you will also make it harder to for you sit back and down and jacking your ankles out ends up making it look like your toes are pointed down from the perspective of the judges, even if they aren’t.
3. Underestimating Simple Patterns
We’ve all heard an age group championship pattern called out like this: Trot down the rail showing two changes of diagonal, beginning on the right diagonal. Stop. Canter a circle to the left on the left lead. Stop. Reverse and trot down the rail on the left diagonal.
As they ask if anyone has any questions, you relax and think, “HA NO! We got this”, but then as you do your pattern, your diagonal changes are unevenly spaced, your circle is uneven and your transitions are sloppy. Never underestimate a simple pattern. In fact, often the stakes are higher when the pattern is simple because the expectation is that you should be able to accomplish this perfectly. The solution to this problem is to treat every pattern the same, with all your concentration and respect!
4. Sloppy Diagonals and Transitions
Sloppy diagonals come in two forms: picking up the wrong diagonals at the start of your trots and sloppy changes. Practice makes perfect for both, but to avoid picking up the wrong diagonals, be patient. It will look far worse if you pick up the WRONG diagonal and change it than if you to sit two more steps of the trot and come up on the correct diagonal. Ideally the amount of time it would take for you to find that correct diagonal will become shorter and shorter over time. Sloppy diagonal changes come from tucking your tailbone when you make the change.
The easiest thing to remember is to not change ANYTHING with your body, just change your diagonal!
Your diagonal change should occur on your seat bones, just like your post does. If that doesn’t help, it may be stiffness that’s battling your smooth diagonal changes, so try exhaling when you have to make a change. Transitions are a far more complicated beast because part of a sloppy transition comes from how your horse makes transitions, but the fundamental keys to getting that smooth, seamless transition are to slow your body and post, maintain your horse’s carriage throughout the transition and to not brace in your stirrups or your hips!
5. Uneven Circles
We’ve all suffered from drastically uneven circle syndrome and it is a depressing problem that can be really difficult to fix. Though once again practice always helps, you can help yourself at the show by determining your center point for the circle and keeping your eyes on it. Horses, especially equitation-whiz-horses, respond more to your body than you sometimes realize. When you have your head turned and your eyes on your center point, your hips will naturally turn in that direction. Your horse will respond to this and round out the circle naturally. If you have a horse that likes to lean into the circle, be there with your inside leg and inside hand to help encourage your horse to move away from that pressure, thus rounding out the circle.
While all of these problems are ones we practice to fight against, there are many unique challenges that can cause us to fall down the rankings in the top notch finals of 2015. Have any ideas of your own to improve these issues? Let us know in the comments down below!
Workout Wednesday: The Exercise that Will Strengthen an Equestrian's Hamstrings March 25 2015
Why bother?
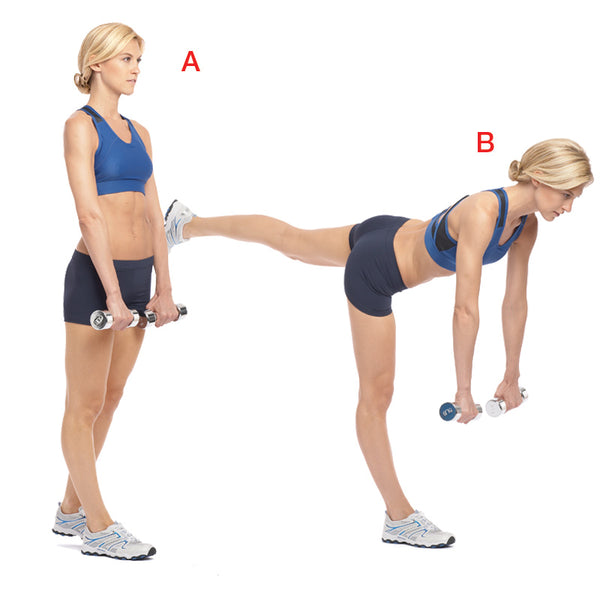
Because as an equestrian, using your legs effectively on horseback means squeezing from your hamstrings, NOT your calves! And for many of us, what keeps our lazy horses from pushing up to the bridle are relatively weak hamstrings and glutes. I say relatively because even if your glutes and hammies are stronger than that of your non-equestrian friends, you’re still going to have a tough time keeping your heels down if your rear chain is weaker than your front chain (like your quads).
Single leg deadlifts are a great way to strengthen your rear chain, and can easily be done at home or at the gym. And because they allow you to work one leg at a time (like Bulgarian squats), they also help you improve your balance, and work each leg without favoring or overcompensating on one side.
How do I do it?
- Start with your feet shoulder width apart. You want to make sure that throughout the movement, your whole foot, from heel to toes, stay planted on the ground.
- Lean forward on one foot (either is fine to start).
- Keep that foot planted as you hinge forward, so your upper body moves down as your other leg moves backwards. Keep your back leg straight throughout, but allow for a slight bend in the knee of your planted leg.
- Keep your eyes forward (not down) as your move through the exercise - this will help you keep your back consistently straight. Then return to the starting position.
- Repeat for three sets of 10-12 reps.
Once you’ve got this movement down comfortably, you can add weights. If you’re using a kettlebell, grip it in the opposite hand to the leg you’ll be extending behind you.
When should I do it?
This will depend on your routine, but if you’re looking to do a quick workout (either at home or at the gym), this is an exercise you should do towards the beginning of your movement, as it engages so many of your large muscles. Make sure to do a warmup and some stretching before you start.
Why We’re Now Offering Free Shipping and Free Returns on Jods and Accessories March 23 2015
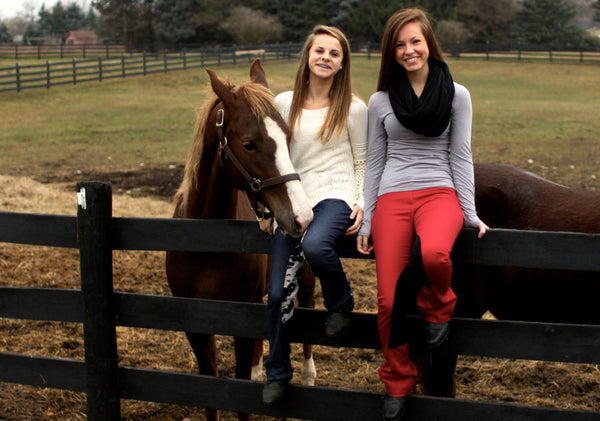
Good news everyone! We’re now offering free shipping and free returns on all of our jods and accessories. Here’s why we’re doing it:
It’s tough to find a great pair of jods
One of our commitments to our customers is to help them find the right jods, every time. This is harder than it sounds. We want to make sure that our customers can order a few pairs of jods so they can find the styles the love and sizes that fit just right, and send back the jods that don't.
We think people need more jods
Far too many of us ride in jeans. Far far too many of us are being perpetually stabbed in the waist by the tiny plastic tines in the waistband, have safety pins holding up our zippers or have duct tape holding the inseam of a severely worn out pair of jods together. You shouldn’t have to wait until you’re at a horse show to buy a pair of jods. Because the internet!
We want to open the industry up to more people, not less
Sadly, most of the horse shows you go to will have a lot of empty seats in the stands. We think that part of the reason this happens is because it is very, very expensive to be an equestrian. We believe that our sport should be open to more people, not less. Fair prices on jods and accessories, with free shipping and free returns are our small part of that.
We may be shooting the moon on this one, sure, but we’re proud to be trying.
How to Get Your Horse Spring-Ready March 16 2015
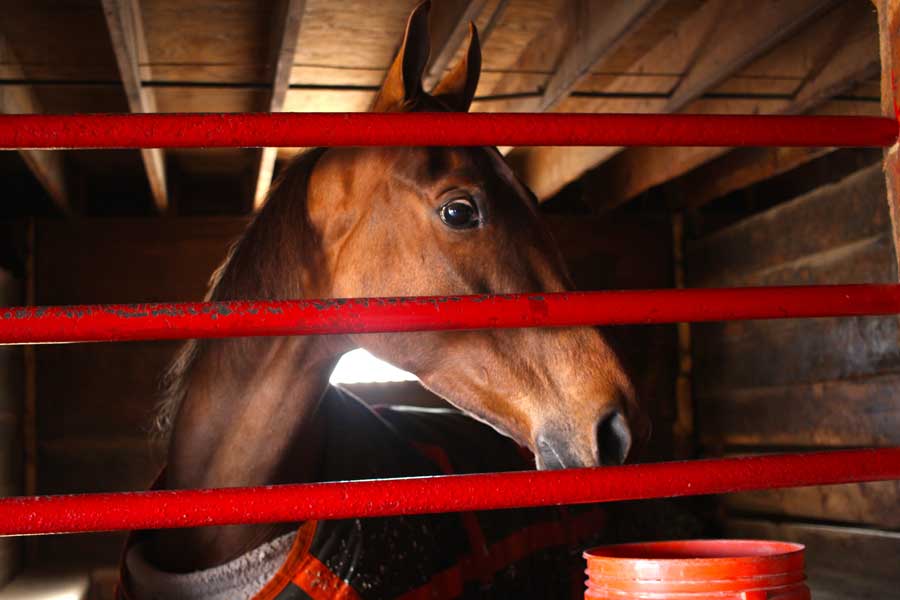 |
As show season has already begun in the south, horse owners who have taken their time prepping their show ring teammate need to get to work! While it may be tempting to just saddle up and start riding, it's as (if not more) essential to get a horse ready for horse show prep as it is to get ready yourself for show season. If you had a few months off for winter (and let's face it, who hasn't), you wouldn’t start by running a marathon either. Here are some tips to help to get horses ready for a safe, ease into fitness for show season.
Proper Winter Nutrition
Horses that are able to graze throughout the winter may be able to maintain a more steady body weight than those with unsatisfactory pasture conditions (like those of us that live up north and have a pasture of ice). Hay helps to maintain a healthy body weight and suits a horse’s natural “grazing” digestive process, but grain supplements may also be needed to give your show horse the extra umph they need to get to work. Horse owners that have the ability to monitor their horse's weight and energy levels can adjust their equine bff’s feed for optimum health. Getting the right nutrition over the winter is a must to ensure that your show horse is ready for the physical demands of getting in shape and staying that way.
Getting Your Horse's Hooves Ready for Spring
If you have your horse at a training barn, it’s likely that their shoes have stayed on over winter, they have been working (though lightly) and they are pretty much ready to go, but some give their show horses a full on vacation; pull their shoes and send them outside to enjoy a well deserved rest. If your four legged friend is in the latter category, it’s important to be aware of what has been happening to their feet while on winter break. While it is a fact that hooves grow at a slower rate during the winter, it is important to note that hooves still continue growing. Cracks and breakage can occur throughout the winter, and bacteria can cause conditions like thrush if hooves are not cleaned on a daily basis. Making sure that hooves get the moisture that they need by having horses stand in a wet or muddy area is recommended to prevent breakage, or supplement the lack of moisture with a regular hoof greasing. Having horses' feet properly trimmed and assessed for problems by a farrier well before you pop their show shoes back on can help you fight off issues that could appear mid-season.
Get Your Spring Shots
Spring is a time to focus on the health of horses before they are under the same roof as so many other horses and expected to perform in tip top shape! Making sure that horses are current on their vaccinations is part of taking care of their health and ensuring they aren’t a part of spreading equine illnesses when you head off to a show. While horses need vaccines for protection against life-threatening illnesses, it is possible for the animals to have a reaction to their shots. This can even happen in horses that have never had a negative reaction before, so owners should be prepared to give their horses a few days to recover after being given immunizations. Even if horses do not have a reaction to vaccines, the medication that is being administered can cause lethargy. AND DON’T FORGET YOUR COGGINS!
Start out Slow
Horses get used to being on their own over the winter, and being exposed to the spring weather may make them feel playful (we’ve all experience the joyous - and horrifying - leaps of spring joy at the first working session of spring). If you have the arena to yourself, turning your horse our in the ring with equipment/tack on before riding them can help them get used to the added weight after a long winter. If that isn’t an option, lunge them with their tack on before getting on. Letting them get some of their energy out is also a tool to help them focus on the task at hand. Be prepared for the first rides of the spring to be short and more challenging than normal.
Getting horses ready for show season is a matter of focusing on health, and easing them back into their routine. Be sure to evaluate the condition of tack and equipment before spring weather arrives, and be patient before heading out on the trail or in the ring to ensure that the process is stress-free, both for you and for your horse.
Workout Wednesday: Why Bulgarian Split Squats Will Help You Stay Centered When You Ride March 11 2015

Why bother?
If the name of an exercise begins with ‘Romanian’ or ‘Bulgarian’, you probably assume that it’s going to be pretty badass. But in this case, a Bulgarian split squat is actually a relatively safe and simple way of getting into squats.
While traditional squats (or ‘back squats’) are a great exercise for strengthening large muscle groups throughout your body, doing them correctly can take years of practice, and you can put your back at risk if you try to lift too much, too fast. Bulgarian squats, however, have all the benefits of a squat, plus they’re much easier for beginners, and you can even do them at home.
And for equestrians, Bulgarian split squats will strengthen the large muscles in your lower body (like your glutes and quadriceps), while simultaneously improving your balance and strengthening your core, all of which will help you stay centered when you ride. And if you stick to lower (or no) weights and higher reps, you'll be able to improve your lower body strength without busting out of your jods.
How do I do it?
While you can do this exercise with weights (by holding dumbbells or plates), be sure to start unweighted to make sure that you can keep good form, and complete a set without causing pain in your knees or groin. To do a Bulgarian squat:
- Set up by folding a towel or placing an air pad in front of a bench (or chair or coffee table, if you’re doing this at home).
- Standing in front of the pad and away from the bench, rest one foot on top of the bench.
- Descend until your back knee touches the pad, then return to your starting position. As you do so, make sure your front knee finishes in line with your toe. If it goes beyond that point, adjust so your front foot is slightly further forward.
- Repeat for 3-4 sets of 15 reps.
When should I do it?
Be sure to do these after some cardio and dynamic stretching to warm up your muscles, especially your hip flexors.
Image from Lifehack.org
The Five Essential Ingredients in a Varied Training Routine March 09 2015
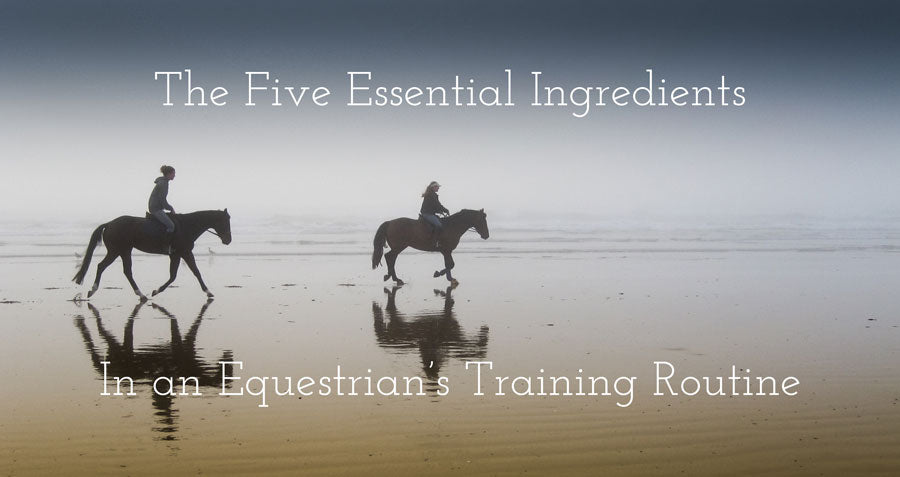
As in any sport, the only way to truly progress your skill as an equestrian is to practice, and practice is most fruitful when it takes the form of a routine! And just as a varied training routine is essential for horses, as riders we need to make sure that we keep on varying our training programs in order to avoid a plateau. Here are the five essential ingredients an equestrian needs to build out their routine:
Bareback/Saddle-No-Stirrup Lessons
Take one or two rides a week to lose your stirrups (literally) and focus on your strength, your balance, and your muscular endurance. While we so often avoid or dread these rides, they are such an important foundation for any equestrian. The balance you gain and the ability to seamlessly lose and find a stirrup again is essential to rolling with the punches on show day.
Lessons, Lessons, Lessons, Lessons
It’s no secret that the more lessons you take, the better off you will be. The more saddle time you put in, the more you will be aware of the individual quirks in your own riding, and those of the horses you practice on (which will hopefully be varied as well). It is also great to ride with different instructors if possible. Different instructors focus on or care about different aspects of riding, and often have different theories about riding. It’s important to vary your approach and training so that you will be able to problem solve through the different instructors you have learned from when you are on your own in the arena.
Lunge Lessons
We have talked about these before in our post about getting over a slump. In that post we mentioned how lunge lessons are a time to really focus on the minute details of your riding (i.e. your body position, balance when a horse surges, and often strengthening exercises as well). These are an important element of higher level training and can allow you to take your leg position from functional, to equitation form! It is so important to know where your legs are. As absurd as it sounds to even have to say that, but seriously…. know where your legs are. We have seen more than a few people fall off from giving their horse an unwarranted and accidental kick in the side. PLEASE avoid that mistake with lunge lessons.
Workout
See a trainer if you can, go to the gym, do at home workouts, see our Workout Wednesday posts, whatever you do, hit the gym! Making sure you are in shape and doing your part is important to being able to work through the tougher rides on the tougher horses that maybe last longer than you wish they would.
Rest Day
Just like your horse, you need to take a day to relax, stay horizontal on the couch or in bed with some Netflix or enjoy some good old fashioned nap time. Let your muscles heal, let your mind turn to mush for one day and just chill. That way, when the week comes back around, you can hit the ground running and accomplish something! If you are running on fumes, you can’t give what you are doing your all.
Do you have any riding tips to share, or any ingredients we might have missed? Let us know in the comments below or on Facebook.
Workout Wednesday: Why Scapular Wall Slides are Great for Riding Posture March 04 2015
Why bother?
These may sound hard and painful but they’re actually pretty easy. And if you’ve ever worried that you look a little bit like Donkey Kong when you ride, then wall slides will be a great exercise for you. They’ll help strengthen your upper back, which will prevent your shoulders from rounding forward as you ride and leave you with terrific riding posture.
How do I do it?
-
Begin with your butt, shoulders and knuckles against a wall, with your hands in a ‘high five’ position and your elbows bent at 90 degrees (position A).
-
Maintaining these points of contact, slide your hands up over your head (position B).
-
Return past your starting position, sliding your elbows down towards your sides as far as they can go.
-
Repeat for 3-4 sets of 15 reps.
When should I do it?
Because all you need to do a scapular wall slide is a wall (duh), they’re a great standalone exercise. They’re also a great way to follow a pushup workout, as they’ll help counter the training of your chest.
How Jimmy Found a Second Life as an Academy Superstar March 02 2015 3 Comments
Jimmy’s show career began at the tender age of five, when he started competing in three-gaited classes. Jimmy went on to have a successful 14 year career as a show horse, ultimately transitioning into equitation.
Eventually, though, life and poor health got in the way, and Jimmy’s owner was no longer able to support him as she wanted. So she reached out to Team American Saddlebreds (TAS) to see if he could be repurposed.
Jimmy’s story exemplifies a new movement of horse owners who are choosing to repurpose their horses over more common or ‘easier’ options, like selling at an auction or to a dealer. While we may not imagine it when we first fall in love with a horse, for many of us, there will sadly be times when an unexpected change in circumstances will mean that keeping a beloved horse is simply not an option. Caring owners always want the best for their best friend, but are often faced with tough decisions.
Which is why, at TAS, we’ve worked to provide Saddlebred owners with another option when facing these tough choices. TAS is a non-profit whose mission is to educate and raise awareness about the dangers facing the American Saddlebred today, and a networking resource for owners, breeders and trainers who would like to find a home for a lower price point horse, and in doing so, supporting an entry level market.
And luckily, this is what we were able to do for Jimmy, who thanks to a team of people, has found a second career as an academy superstar. He now resides at Brannon Stables in Midway, Kentucky and this past summer returned to the show ring carrying the next generation of riders to the winners circle several times.
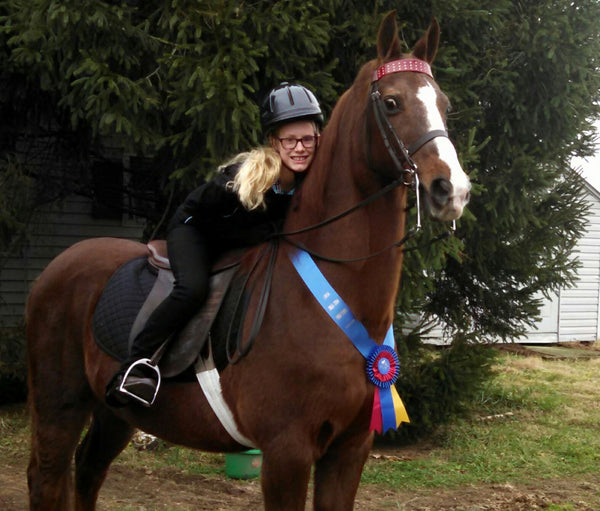
Hannah, one of Jimmy’s new riders, couldn’t be happier. “I have always loved horses”, she said, “I rode him in my first workout class and he helped me through it. Before a show, especially a big one, my legs are shaky and I am nervous but when I get on a horse I feel like I leave everything behind.”
Jimmy is a 25-year-old registered American Saddlebred, and his story is a true testament to the stamina and versatility of the breed; an amazing example of what a well cared for Saddlebred is bred to be. His story is also a great example what the TAS volunteers and supporters strive for.
As horse lovers we all want what’s best for our horses, whether it’s that lesson horse that taught us to post, or the horse that helped us achieve our dreams in the show ring. Taking time to raise our level of responsibility and follow through for each horse we encounter at every level will ensure a better outcome for more horses. Because in the end, we never would have made it to the top if we didn’t have each horse it took to get us there.
About the Author: Jennifer Hegg is the Secretary of Team American Saddlebreds, an alternative resource and networking group for unwanted Saddlebreds. They hope to raise awareness and responsibility for anyone who interacts, owns, trains, breeds or loves these amazing horses. We are a non-profit that is 100% donation and volunteer run. Learn more at www.rescuemeasb.org.

